Following on from our initial post about our InMoov robot; we thought we'd go ahead and tell you about the cameras we're using.
Most people starting out with InMoov choose to create the Finger Starter to begin with as it's a great place to get started with robotics and Arduino.
As we're already familiar with this; we chose to jump straight in and build the head.
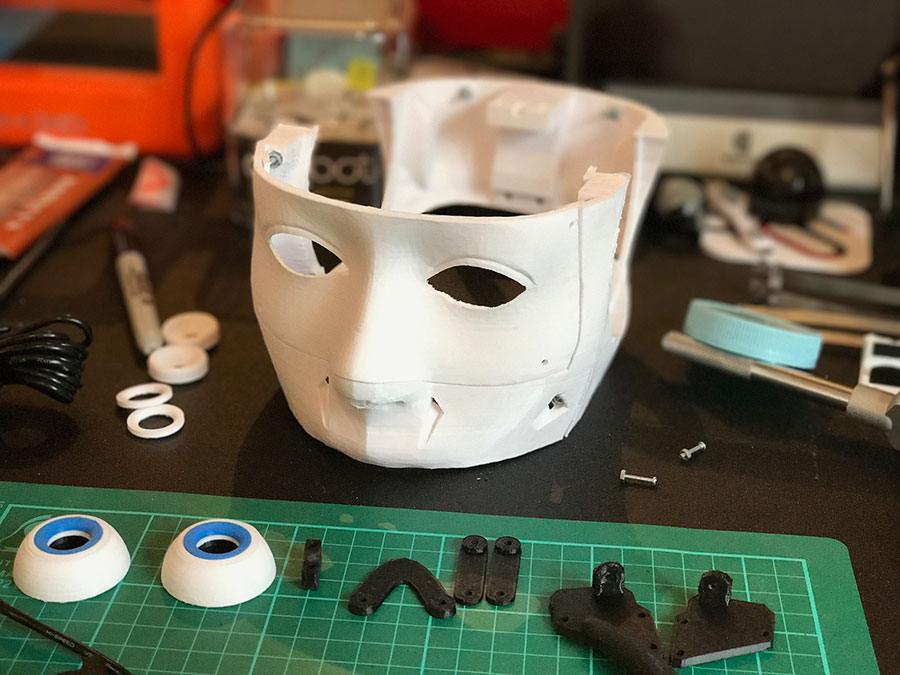
As you can see; we've already printed and assembled the main outer sections of the head and have started on the eye mechanism.
InMoov currently has two options for the cameras to be fitted into the eye mechanism.
- Hercules HD Twist webcam
- Microsoft LifeCam 3000
On the InMoov website; Gael notes that the Hercules HD Twist gives a better image than the LifeCam so we opted for the Hercules.
We picked up two purple ones on Amazon as they were the cheapest at that time; the colour is irrelevant as we'll be stripping them down anyway.
Disassembling the cameras
We didn't think to document each step of this until we'd already done both cameras (sorry) but we've noted below each step along with each section of the camera. Hopefully it's still clear as to what's required.
There are three screws holding the white plastic section together; one is immediately visible and the other two are beneath the smaller, black rubber piece.
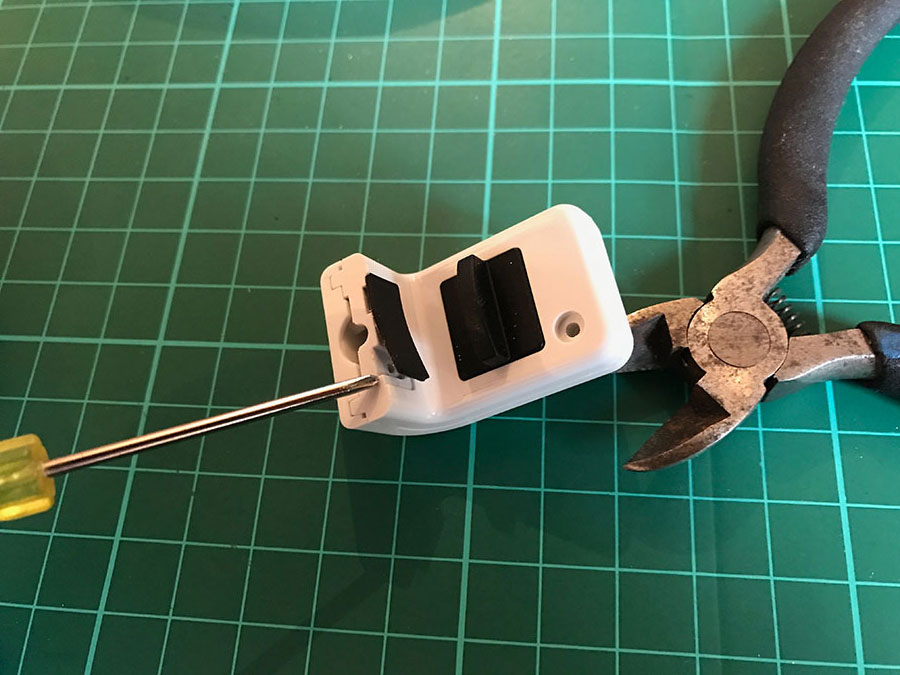
Remove the rubber piece and the three screws - then pry apart the white plastic section with care.
Once opened you see the camera circuit board which is held in place by a single, black screw.
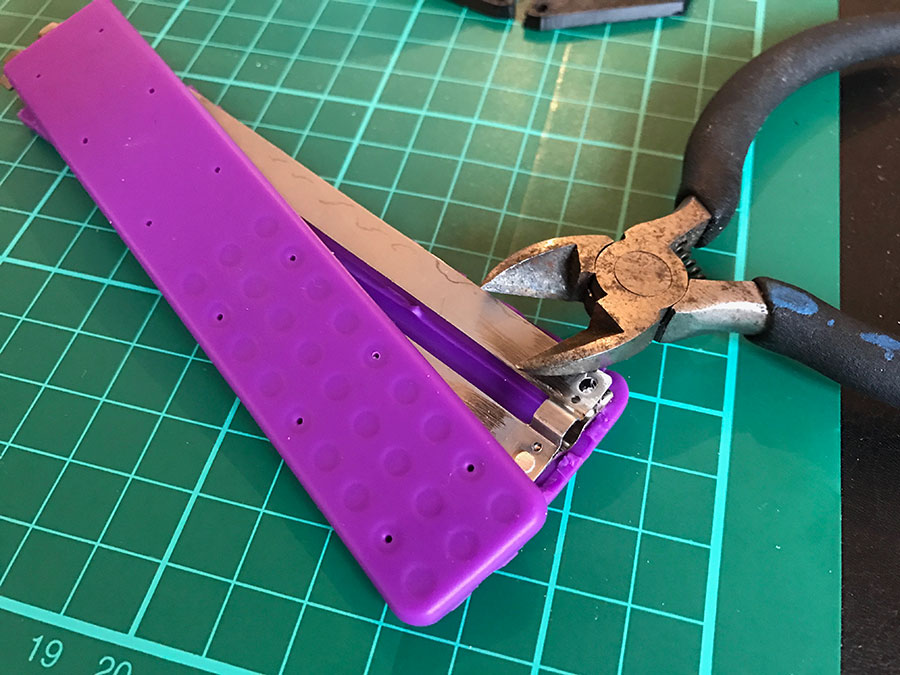
Once removed; carefully cut the main, coloured rubber section away at each side and pull gently to separate each side from the metal parts below. Be careful not to cut into the cable!
Once disassembled; the metal part that gives the camera its "twist" positioning capability, wraps the cable with two riveted metal parts at the top and bottom.
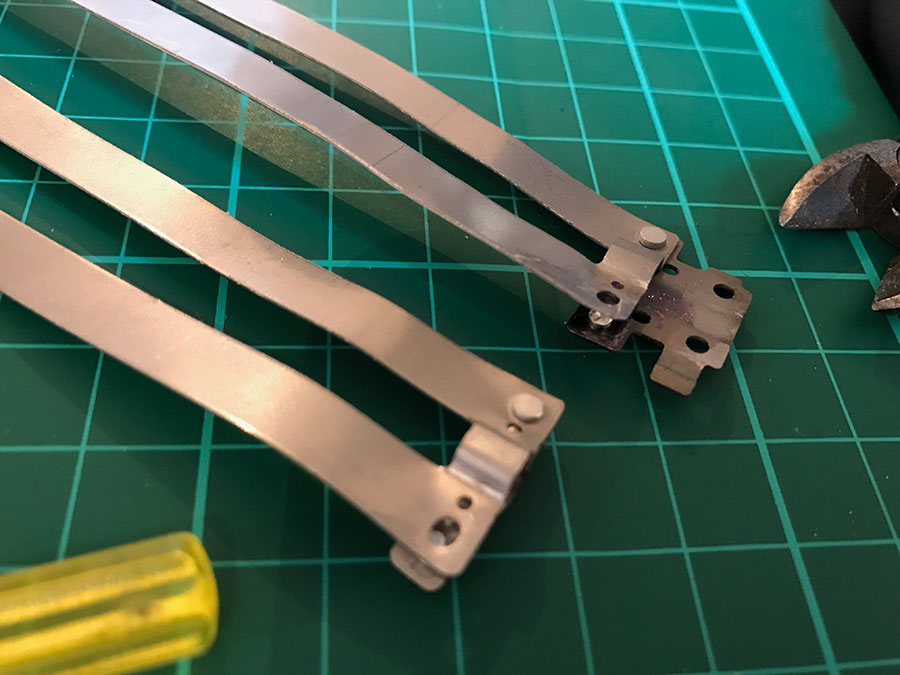
The rivets in these parts are very soft metal; we initially thought to drill these out but cutting them back a little with snips and then using a small, hobby file proved very easy and quick to remove one of the rivets on each metal part in order to release the cable.
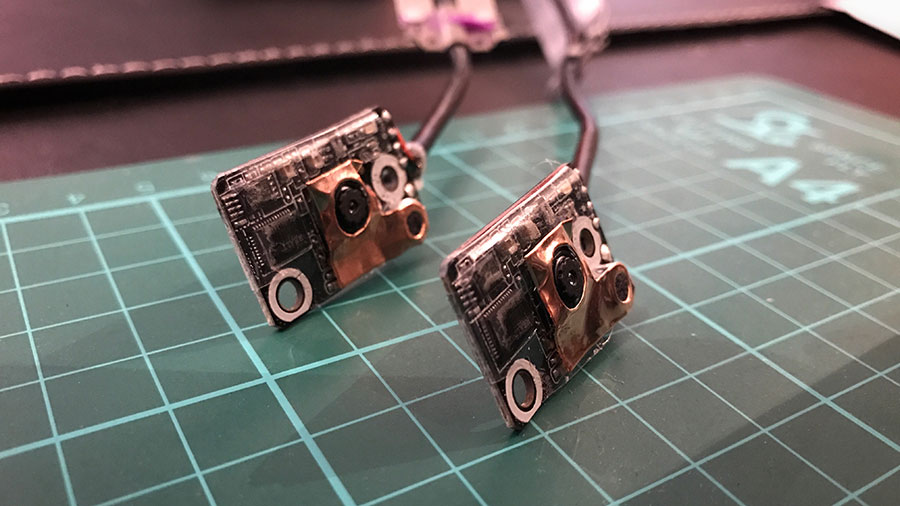
When fully stripped down; we mounted the cameras onto the correct 3D printed parts. We did not drill or tap the mounting holes and re-used the silver screws from each Hercules enclosure.
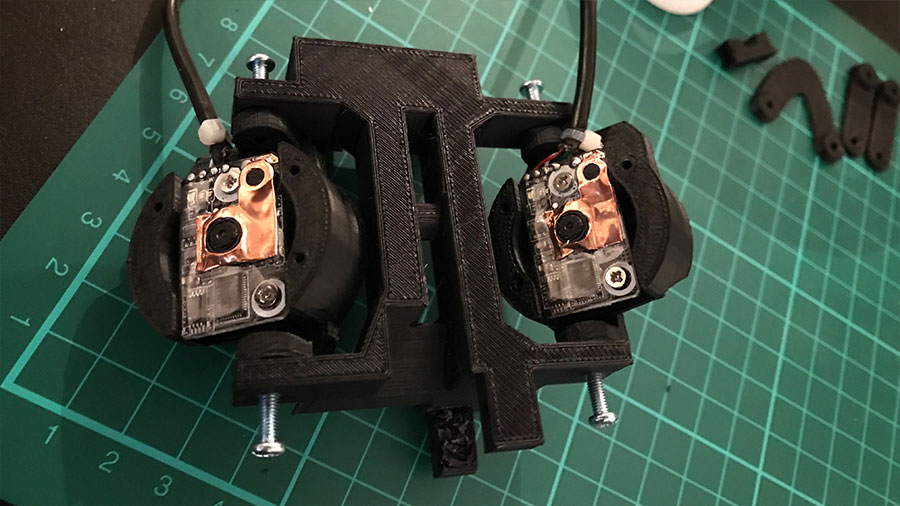
Take care to follow the Eye Mechanism Assembly instructions in order to successfully get to this stage but we will cover this in our next blog post.
InMoov - Part 2
From here; we'll assemble the eye mechanism in our next blog post.
- Part 2: Eye Mechanism
InMoov - Index
If you haven't read about our build from the beginning; be sure to check the initial blog post/index: