
InMoov is an open source, 3D printed, life-size robot created by Gael Langevin, a French sculptor and designer.
We started work on our InMoov just before Christmas and we've been busy buying the electronic parts and printing the head to the point where we can start showing what we're doing and how we're doing it.
We'll update the blog with stories covering the build from now; so please check back regularly for updates.
Before you start
You need quite a few things before you start building InMoov.
The InMoov website is a great resource but some information is out of date and/or a little confusing.
We hope that in following our build process, as well as keeping up-to-date with the InMoov website, you'll have a better understanding of how to build your own version if you decide to take the plunge!
Building InMoov will take a lot of time; there's loads to print and work with as well as all the servos, circuits, Arduinos and cables you need so it's certainly not a weekend task (unless you have loads of 3D printers maybe).
3D Printer
You need a 3D Printer with at least 12 x 12 x 12cm print area.
You'll also need a very generous amount of black & white filament (or other colours depending on your plan) as well as small amounts of other colours for any customisation etc.
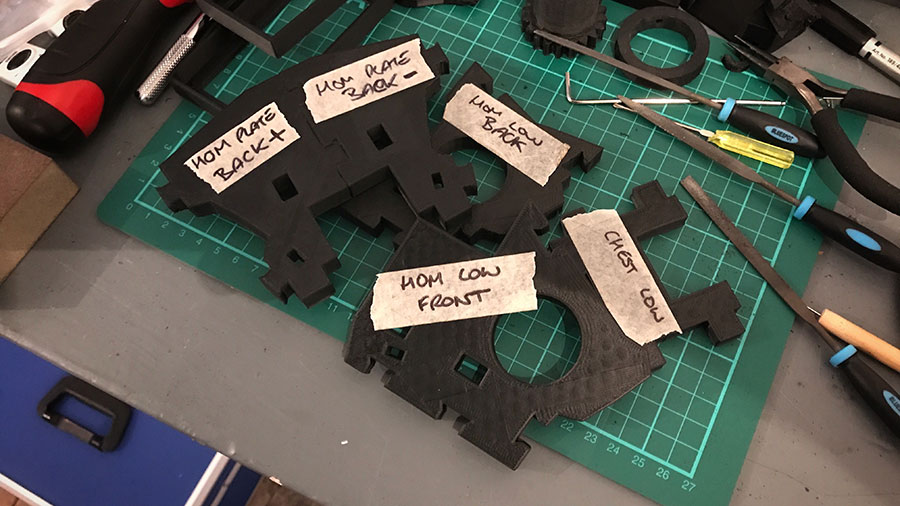
There's lots and lots and lots of parts; some of which aren't easily identifiable, especially once you've got a number of them lying around.
When you've printed each part, it's a good idea to label each of them so that assembly is much easier.
Arduino Mega 2560 R3
You need 2x Arduino Mega 2560 R3 if you're building the complete robot.
You can pick up Arduino clones cheaply or; of course use genuine Arduino/Genuino boards. We picked two genuine Mega 2560 R3 up from Maplin as they had them in stock and were the cheapest too.
Circuit Boards & Connectors
You can; of course source the parts and build these yourself but the Nervo Boards from Gael aren't really expensive, they're excellent quality and it's always good to support the creator any way you can.
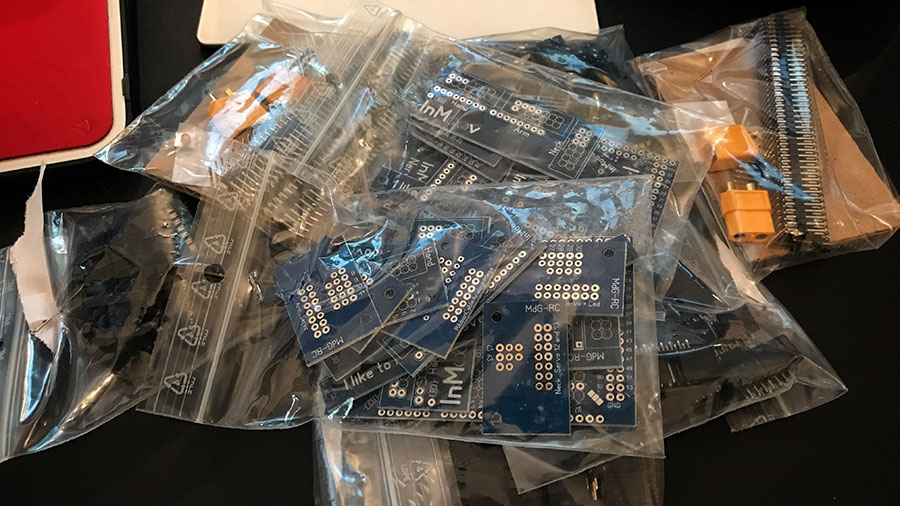
You need 2x Nervo Boards for a complete InMoov robot.
The Nervo Board, with and without components are available from the InMoov Shop.
Electronic Components
You'll need a bunch of electronic components cable and wires; if you're a maker you will no doubt have quite a few lying around anyway.
If you don't have any electronic components at all; it's not a bad idea to pick up a cheap pack of mixed, basic components (resistors, capacitors, LEDs etc) online or from places like Maplin as they always come in handy and if you're building InMoov you're bound to build other things.
This list assumes that you have the Nervo Boards with components from the InMoov Shop.
- 3m (approx) Ribbon Cable - 14 Core 28AWG
- 4x 3mm Blue LED
- 2x 3mm Red LED
You can change the colour or omit the LED's if you so wish.
Screws, Nuts & Bolts
You need quite a lot of screws, nuts and bolts - it's worth making sure you have plenty of these in various sizes as it's always handy to have a bunch of different options as once you start building.
It's very annoying when you need a screw or nut that you don't have to hand!
Below is a list of the hardware you will need:
- Countersunk machine screws/bolts.
- 50x M3 x 20mm
- 50x M4 x 20mm
- 10x M4 x 40mm
- 10x M4 x 50mm
- 20x M3 x 12mm
- 20x M8 x 100mm
- Nuts
- 50x M3
- 50x M4
- Flat-head, self-tapping screws/wood screws
- 100x M3 x 12mm
- 50x M4 x 20mm
You will also use the various screws that you will acquire with servos etc.
Tools
Below is a list of tools that you will nee; not all are absolutely necessary but the list speaks for itself really.
Have a really good read through the Build Yours section on the InMoov website to get a good idea of what's being used and what's needed.
- Soldering Iron (and solder)
- Dremel or other rotary tool and attachments.
- 1mm Drill bit.
- 2.5mm Drill bit.
- Sanding block/sand paper
- Hobby files (a small set of)
- Screwdrivers
- Allen keys
- Pliers
- Snips
- Hammer
Misc
- 1x Tube of Silicone grease (80g).
- Adhesive
- Epoxy for PLA
- Acetone for ABS (also good for smoothing ABS parts)
Building the head
We started by building the complete head as that's where we wanted to start working with the robot.
The eyes & eye mechanism with the head and neck sections comprise of a vast array of printed parts and electronics. It's most certainly not the easiest place to start.
If you're new to Arduino and Robotics you may want to start with the Finger Starter mini-project before tackling the complete build.
For the Eyes & Eye Mechanism
- 2x Hercules HD Twist web cameras.
- OR 2x Microsoft LifeCam 3000
- 2x DS929HV Servos
For the Head & Neck
- 2x Hitec HS-805BB Servos
- 1x HK15298B Servo
We will update this list as we go along, including everything we have used in our build.
Updates:
Below is a list of the current sections that we have covered:
- Part 1: Cameras
- Part 2: Eye Mechanism
- Part 3: Head and Neck (coming soon)
- Part 4: Torso and Back (coming soon)
- Part 5: Arduino and Electronics (coming soon)
- Part 6: Chest (coming soon)
Related Posts:
Not necessarily covering the build of the robot, but related to software or other hardware, observations etc.